Supabase project preparation
Create a Supabase project
- Install Supabase CLI: Official documentation
- Open your bash
- Login with Supabase:
supabase login
- Create new project (For example
demo-chat):
supabase projects create demo-chat
- Select your organization
- Select an region
- Insert a secure password for new Postgres database (Save this in a secure location)
- Obtain your
REFERENCE ID(After command select your project, for exampledemo-chat):
supabase projects list
- Obtain your
anonkey (After command select your project, for exampledemo-chat):
supabase projects api-keys
- Edit
example projectfileexample/lib/supabase_options.dart, insert your project{{your_project_reference_id}}and{{supabase_anon_key}}
Prepare Supabase project
Inside the example project (example/utils) there is a script, running the latter will automatically configure the Supabase project, creating tables, security rules, buckets and everything that is necessary for the example project to function.
In order to run the script you need to be aware of the following information about your Supabase project:
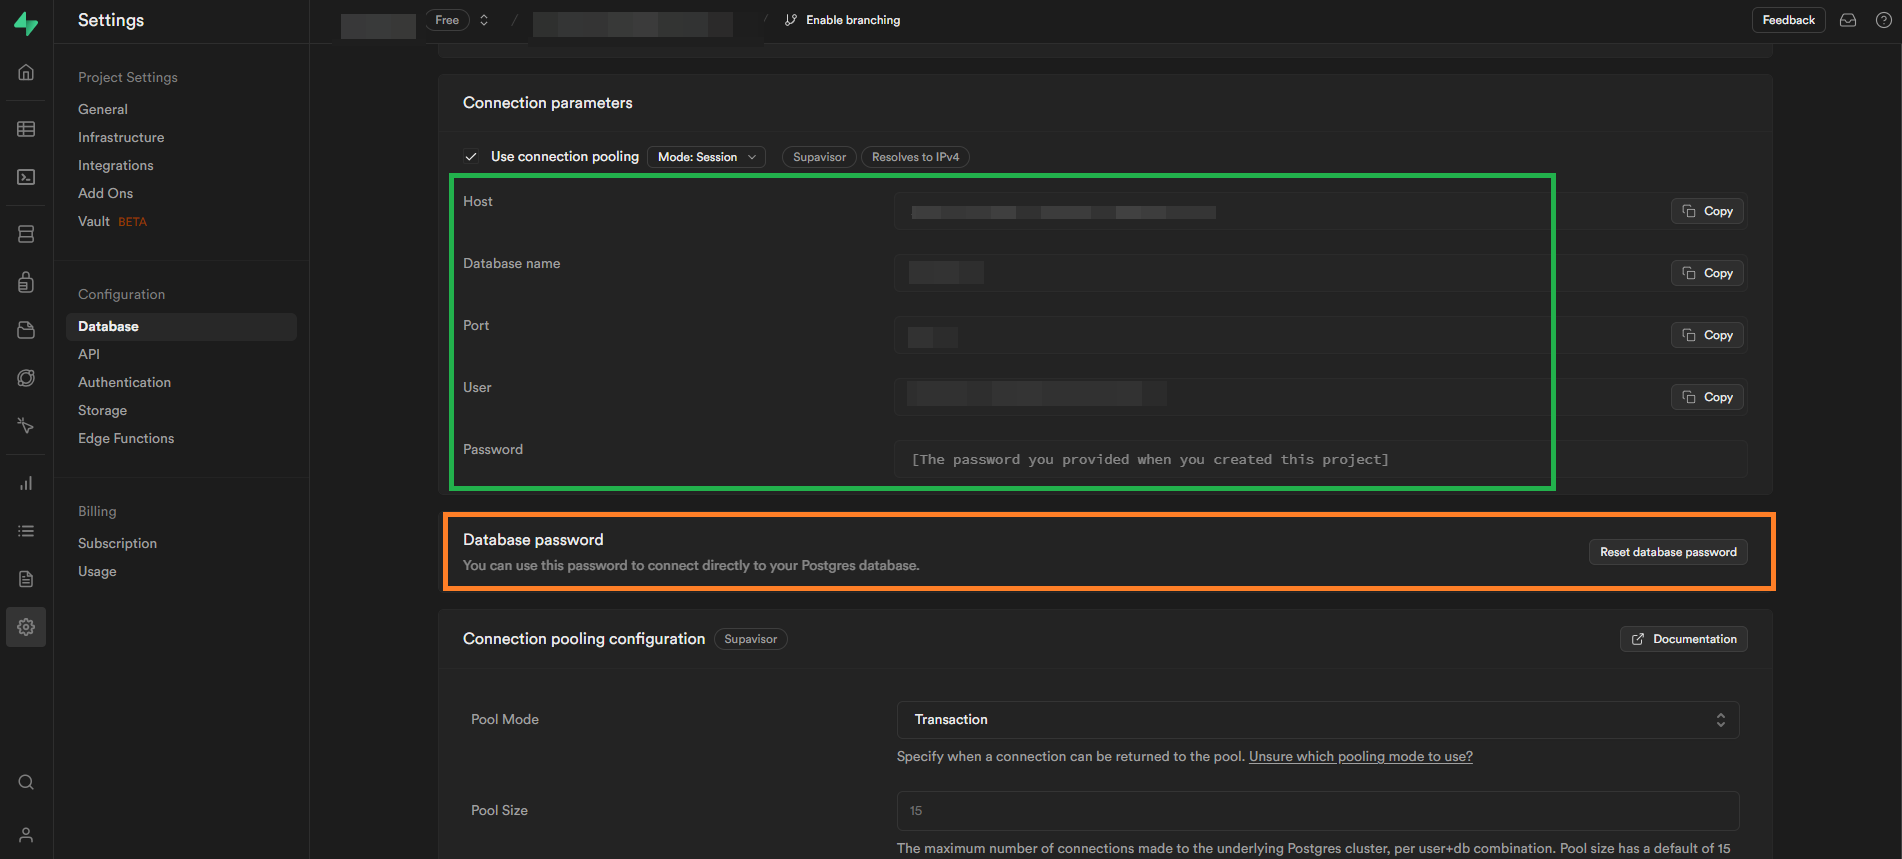
host: Project hostport: Database portdatabase: Database nameuser: Database userpassword: Database password
This information, with the exception of the password which is provided only during the creation of the database (if necessary, you can use the password reset function of your database to obtain it), can be found very easily from the Dashboard of your Supabase project:

Running prepare script
Below are the commands for running the scripts (During execution you will be asked for the password for your database user):
Required
psqlinstalled -> Official documentation
Linux
cd ./example/utils/
./prepare.sh -h "your-postgres-host" -p your-postgres-port -d "your-postgres-database-name" -U "your-postgres-user"
Windows
cd .\example\utils\
.\prepare.ps1 -hostname "your-postgres-host" -port your-postgres-port -database "your-postgres-database-name" -user "your-postgres-user"
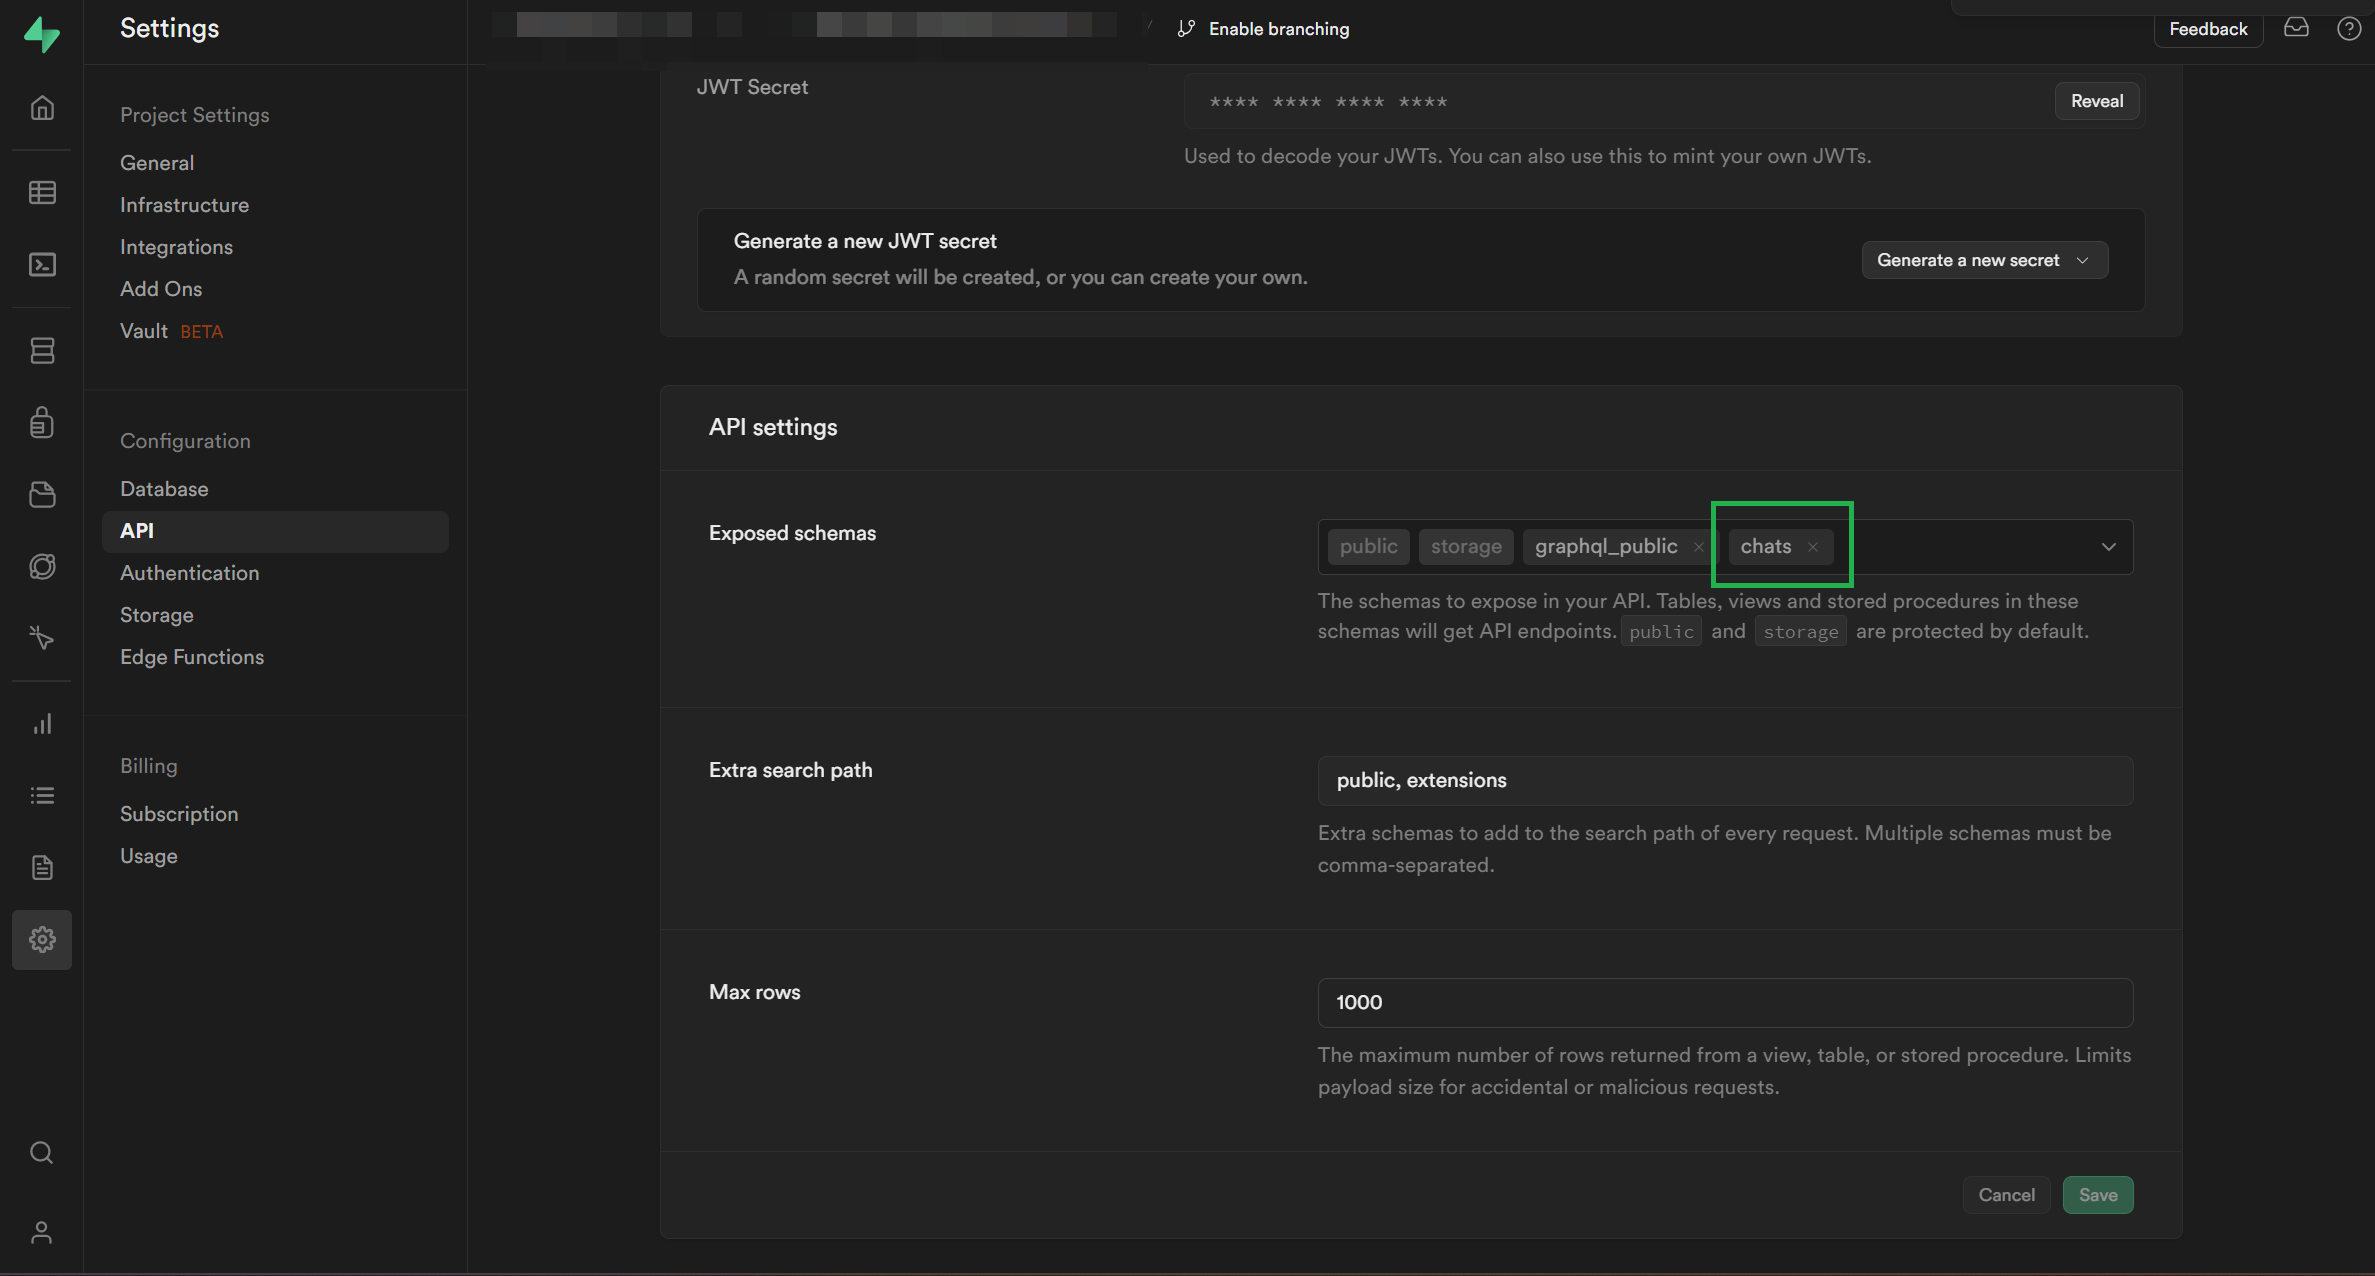
after running the database preparation script. you need to change the database schema exposure setting by adding the chats schema (from the supabase dashboard):

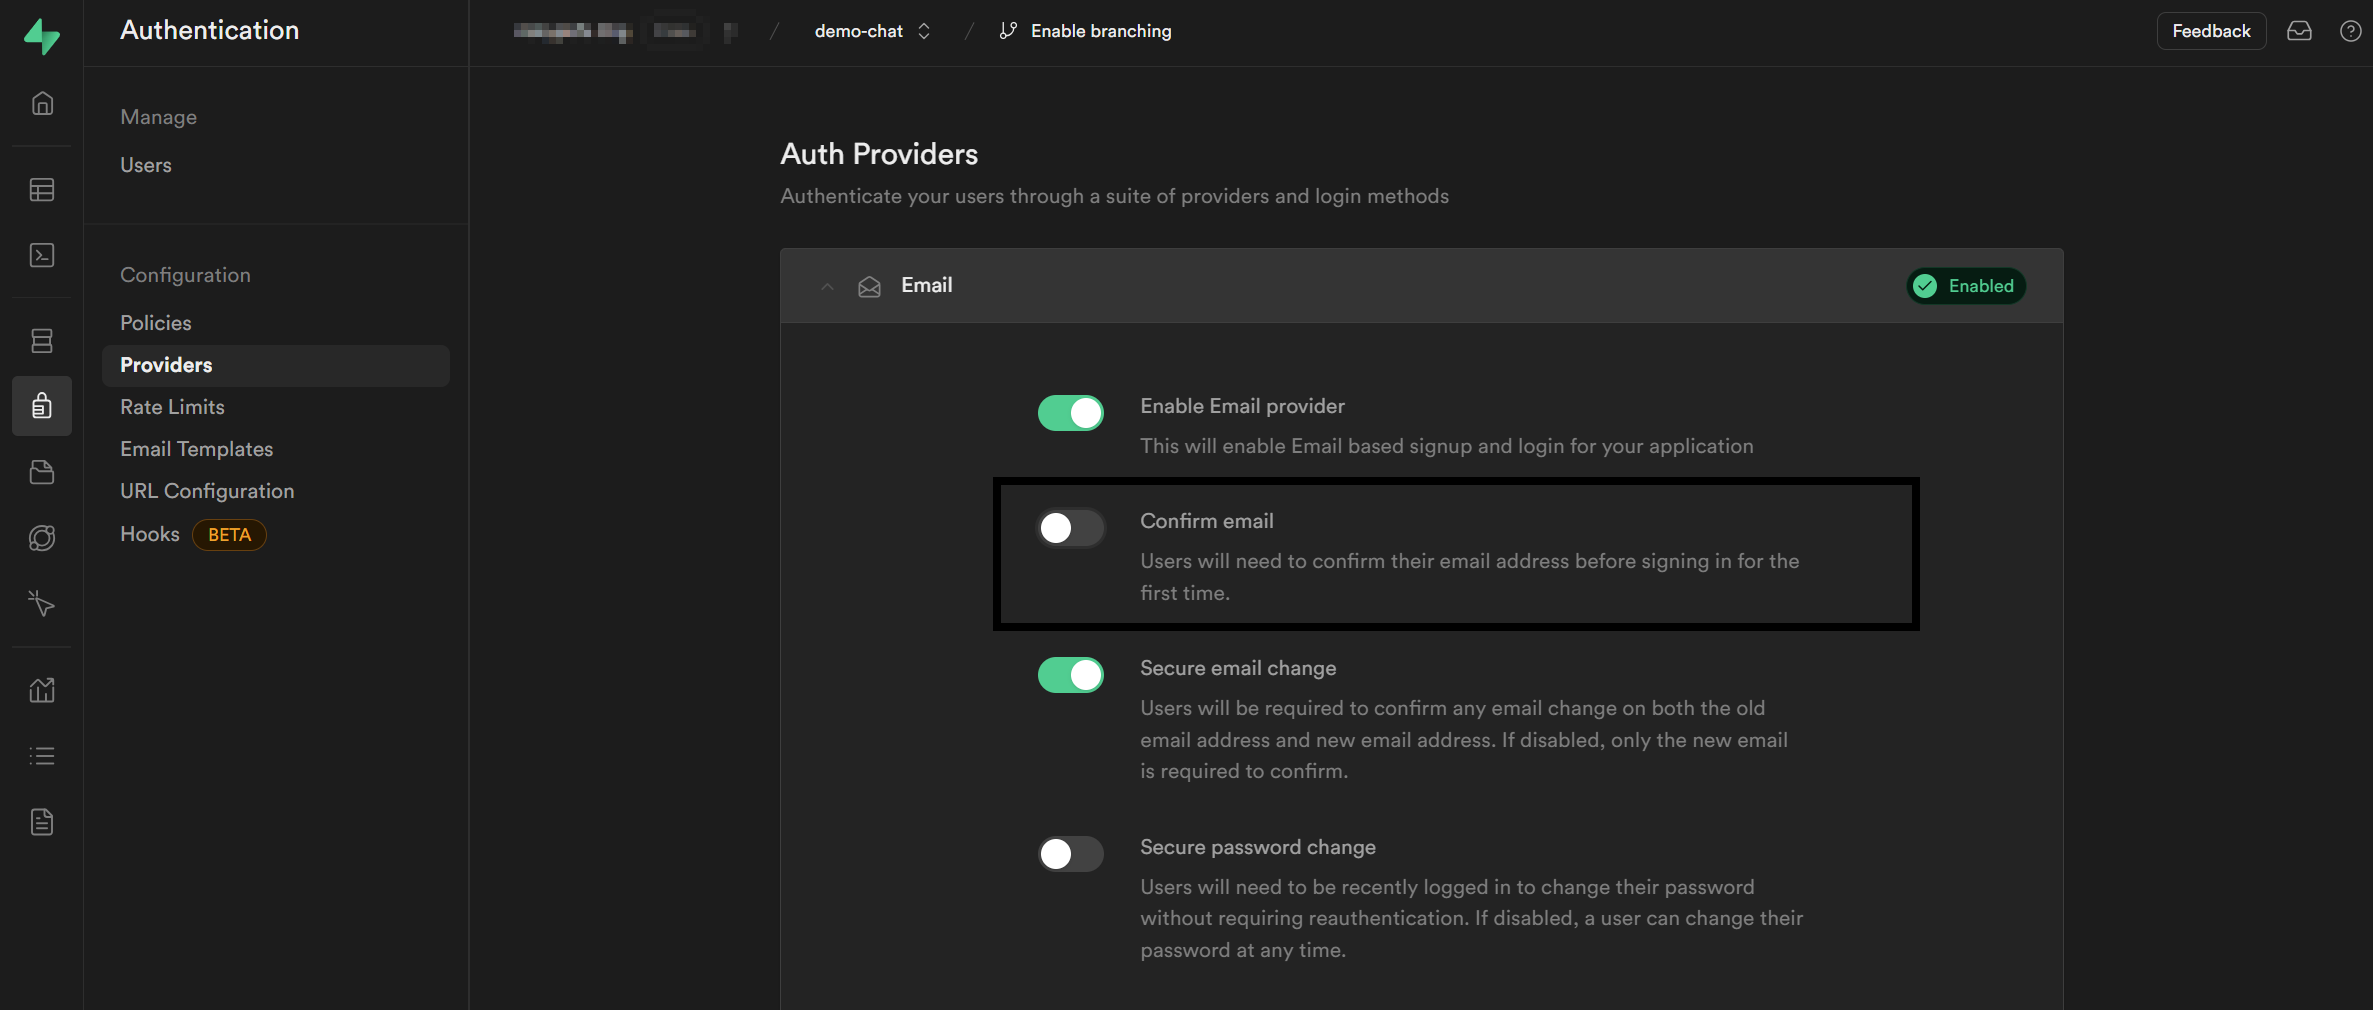
Optional (Only for test): Disable email verification and save the configuration (To speed up testing and allow user registration in just one click, it is advisable to disable mailbox verification):

Read our documentation or see the example project. To run the example project you need to have your own Supabase project and then follow Add Supabase to your Flutter app, override example/lib/supabase_options.dart, don't commit it though 😉
After all of this is done you will need to register a couple of users and the example app will automatically suggest email and password on the register screen, default password is Qawsed1-. To set up Supabase Security Rules so users can see only the data they should see, continue with our documentation.